sweet potato gnocchi
The gnocchi I’ve had at restaurants has been mushy, pasty, and usually served with a thick creamy sauce that resembles gravy. By the time I’m half finished my teeth are craving something to chew and my bowels are twisting. I almost always regret having ordered gnocchi.
I’ve bought pre-made gnocchi at the market as well, and the result was the opposite. Hard and chewy, this is not the pasta dumpling I crave.
Gnocchi should be light like a dumpling, but not pasty. It should hold its form in your mouth, but not feel like gum. Gnocchi should be flavorful and could be eaten on it’s own without a gravy sauce to hide the lack of quality ingredients.
I’ve been making my own gnocchi for years. It’s easy, requires little tools, and my kids can help without me constantly watching over their shoulders.
I like ricotta and herb gnocchi, but my kids love sweet potato. So here is the recipe for sweet potato. You can swap the sweet potatoes with a container of Bellwether ricotta and a couple tablespoons of finely chopped herbs if you like.
3 small or 2 large sweet potatoes
3/4 cup grated Parmesan cheese
1 egg
1/2 tsp. salt
1 ½ -2 cups organic flour (plus more for rolling)

Wash and steam the sweet potatoes until you can stick a fork through and pull it out very easily. About 30-40 mins.
Rinse in cold water and pull the peel off. Mash the sweet potatoes in a bowl and let them cool off. (preparing the mashed sweet potatoes the day before is fine too. I usually put my bowl of hot mashed potatoes in a larger bowl with ice water to cool them down quickly while I prepare my other ingredients.)
Add the egg, cheese, salt, and mix. Add the flour and slowly work it around with a fork. You don’t want to mix the flour in much at all. The flour should just coat the dough. Lay a large baking sheet out and line it with wax paper. Sprinkle flour all over it.
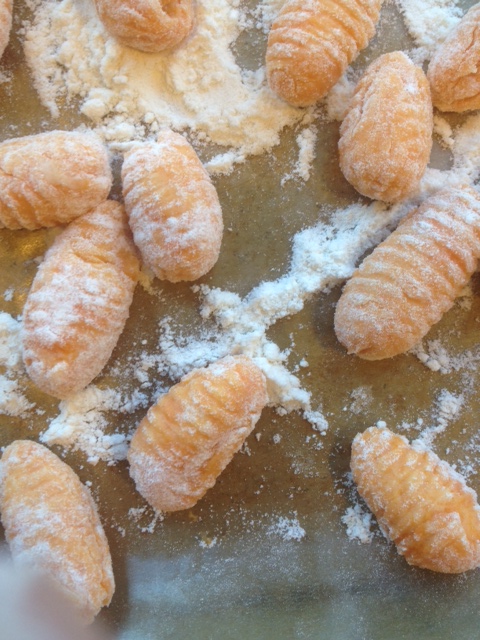
Use a wooden cutting board and take a small ball of dough (golf ball) roll it between your hands gently. If it sticks to your hands coat them with more flour and roll it out on you cutting board until it’s 6-8 inches long, coat with more flour if it’s sticking to the board. Cut the dough into ½-1” pieces with a butter-knife and lay on the baking tray in a single layer without touching. Sprinkle more flour over the top once all the dough is made into pieces. Take your gnocchi board and flour it generously.

Now roll each piece of dough in a circular motion twice and then up and down twice. Drop the gnocchi back onto the tray. If you don’t have a gnocchi board you can use a fork, or a wood board. The second molding of the gnocchi is KEY. Here’s why: The dough itself is very malleable after you roll it onto the cutting board the first time. I think this is where other gnocchi falls short and feels gooey. It needs to have a bit more touch to it in order to hold its texture during the boiling process. Also the texture helps hold the sauce. The gnocchi should be able to stay in one shape after it’s rolled on the gnocchi board, but do not over work it. There is a fine balance that comes with making them over and over. Did I mention a glass of wine or tea should be by your side. This is slow cooking and you should always be prepared! The gnocchi can be left for a while until you are ready to cook it. Once the water is at boil throw in scoop of salt in. I cook my gnocchi in batches (about 5 gentle handfuls at a time to 4qt of water. Cook the gnocchi for 3-4 minutes. Drizzle olive oil on your serving bowl lay the gnocchi over as it cooks and drizzle more over the top. Add you sauce and serve.

Favorite sauce for Sweet Potato gnocchi: Pesto
Favorite sauce for ricotta gnocchi: brown butter and sage or a light tomato
“I do not claim to be a professional. I just know my shit”
-the person born the year of the horse
Pasta Verte. So simple and lovely. This is how I love to spend my sunday afternoons. A glass of wine, some great music and rolling up my sleeves to make this beautiful treat.
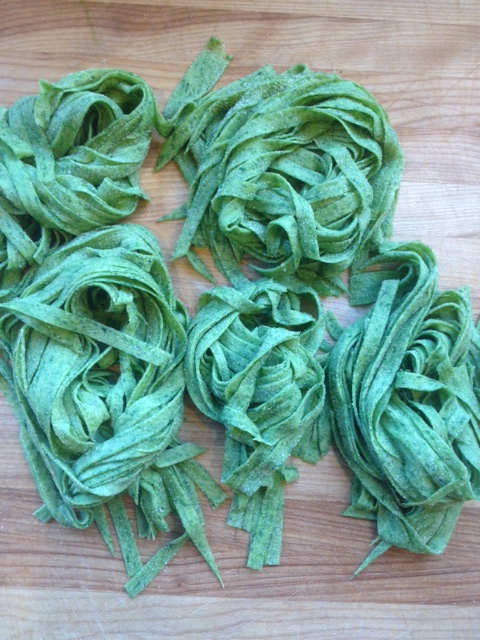
If you have a pasta machine or chitarra pasta cutter, you can make this type about very easy. otherwise I suggest hand rolling pasta. It’s so relaxing once you get into the groove, and kids can help too. You really can’t mess this up.
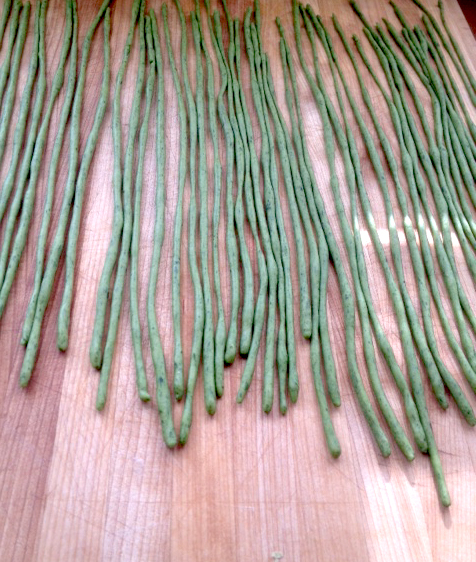
Here are long noodles, like spaghetti only better!

Or trofie. Take a tini ball of dough and press between palms roll back and forth 3 times. Quick and easy.
Recipe for Pasta Verte:
1lb. organic semolina flour (about 2 1/2 cups)
2-3 large handfuls of spinach
3/4 c. water

Make a mountain of Semolina on a large wood cutting board or surface. Boil a large pot of water and drench the spinach. Boil for 1 minute. Drain, rinse with cold water and squeeze out the water. Put it in a blender or food processor, add the 3/4 C water and blend for no more than 5-10 seconds.
Make a well in the middle of the flour and pour the spinach mix into it. Use a folk to incorporate it at first then work with your hands. If it feels too sticky, you may add more flour a little at a time. If it feels too hard/dry, brake it up a bit and sprinkle a little water.

It should feel between clay and play-dough. The graininess from the semolina will eventually become soft as you knead the dough. 10 whole minutes (this is the time to have your glass of wine or tea by your side). Knead the dough close to waist height. If your work surface is too high, push the board away from you and possibly against a wall so you can knead it a arms reach in front of you rather from above. This will prevent shoulder pain.
Wrap in plastic and set aside for at least one hour, or overnight in the fridge. Cold dough works great for hand rolling.
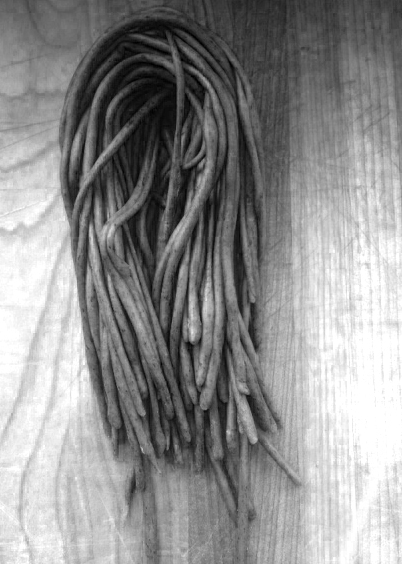
When you go to roll out your pasta, it is important to wipe away any loose flour on your board. A clean surface will help your pasta to roll rather than slide. I really like these noodles because they are really easy. Take a small ball of dough roughly the size of the top part of your pinky. roll it with your hands at first to elongate it then on the board gently moving from the middle to the ends with both hands. lay flat on a floured surface to dry. Once the pasta has dried a bit, 30mins or so, it can be collected together. It may stick over time and become one big blob, but don’t worry, it will separate once the pasta submerges into boiling water.
Once your water is at boil. Salt it generously…And I mean that! I keep a small bowl by my stove with course sea salt. When the water boils, I take a nice scoop with my hand and drop it in. The salty sea water will season your pasta perfectly.
Boil times:
Hand-rolled noodles: 3 mins
Trofie: 4 mins
Pasta machine noodles: 1-2 mins
Mangiare lento, mangiare bene
(eat slow, eat good)
*
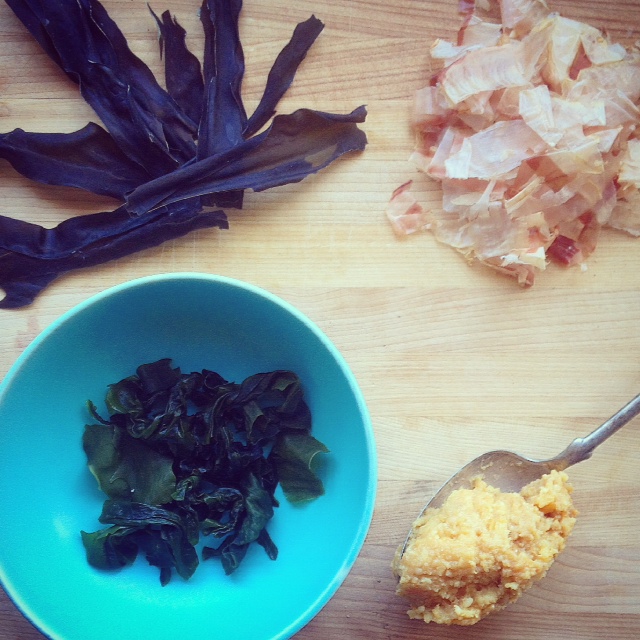
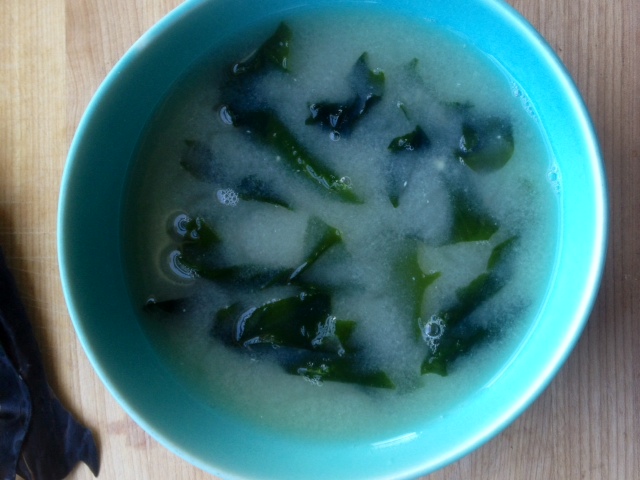
On a cold day Miso soup warms you right up. It’s so simple, and kids LOVE it!
8 cups of Water
A few strips of dried Kombu It’s LOCAL! Let me know if you would like some Sonoma grown. otherwise you can buy at almost any grocery store that has a simple Asian section.
A hand full or two of Bonito Flakes (dried fish flakes: usually a grocery store like Whole Foods will have this, but the Asian markets will have the it at a better price and larger bags.) After opening, stash in fridge. It will last a long time in there.
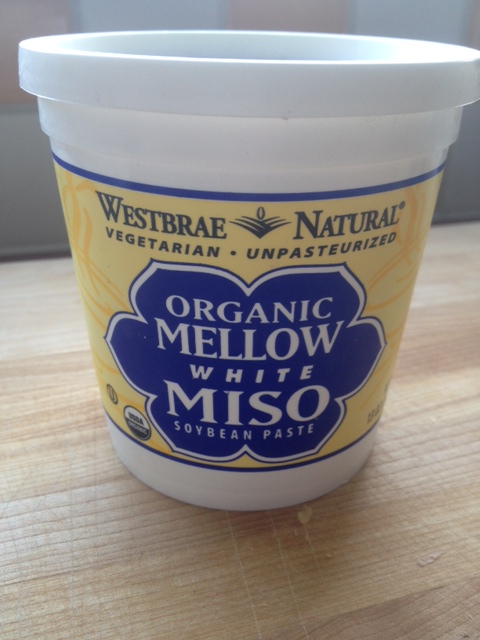
1T Miso paste
A hand full of Wakame Seaweed. It’s LOCAL! Sonoma grown
Soft tofu (optional)
Green onion (optional)
Put the water on to boil and add kombu. Once boiling turn off the cooker and add the fish flakes. Let sit for 10-15 minutes. at this time add some cold water to the Wakame seaweed and let that stand 5 minutes, squeeze the water out and put to the side. Stain the Bonito flakes and Kombu, and here you have your basic Japanese broth. Add a Tablespoon of Miso paste and whisk over low-heat. Take your soup bowl add a small portion of Wakame seaweed, some cubed tofu, thinly sliced green onion. Pour the delicious nutritious miso broth over it all and slurp!
Grain Free, Dairy Free Spice Cake!
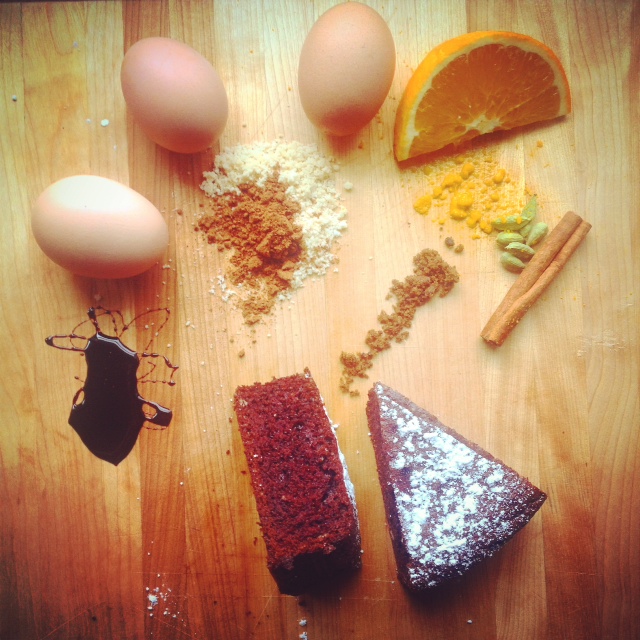
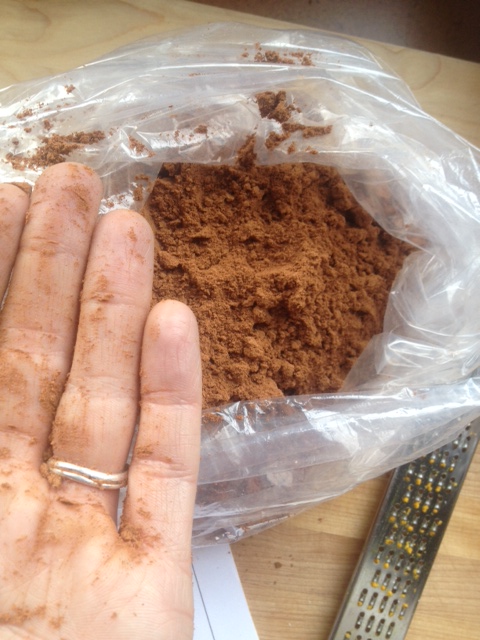
I spotted grapeseed flour from Cabernet Sauvignon grapes in the bulk section at Oliver’s Market. The seeds and skins make this powdery chocolate colored flour. It tastes a little bitter, but I used 1/4 cup to 1 1/2 cup almond meal and there was no bitter taste. It’s high in protein and antioxidants!
1 1/2 cups almond meal
1/4 cup grapeseed flour
1/3 dark brown sugar
1 teas. powdered ginger
1 teas. cinnamon
1 teas. powdered cloves
zest from one orange
2 Tbls. orange juice
2 Tbls. molasses
2 Tbls. grape seed oil (I used this oil because I had it, but I’m sure you could use melted butter or olive oil just fine)
3 eggs (separated)
1 Tbls. sugar
*vanilla extract
* I used these spices because I like the smells and tastes this time of year. Substituting the spice mix for cacao powder, and adding a little chocolate or extract could be used instead. Just stick to the ratios of dry to wet ingredients: 2.5:1
I throw the almond meal into the food processor and blend for a minute or two to try to get the meal finer – it almost turns into a dry paste but I think this helps the constancy in the end.
Turn oven to 350F. Oil a 8″ springform pan and set a circle of parchment in the bottom.
Mix the flours and other dry ingredients (except 1 Tbls. sugar) and blend with your *hands. I use my hands for two reason: I feel I can blend the ingredients better and smooth out any clumping that occurs with the almond meal and brown sugar, and I like to work with my hands. More about hands! I have an upcoming class on Working With Your Hands in January.
Add oil, juice, molasses, and yolks into the dry ingredients, and whisk with a fork until well blended.
In a mixer, whisk the egg whites until foamy add a little sugar slowly while whisking and continue until glossy white. about 2 mins.
Add 2/3 egg whites into the mix and fold in until there is no white remaining. Add the rest of the egg whites and fold in gently. Lay mixture into the springform pan and place into oven for 25 mins.
Let rest for 15 mins before releasing the pan and placing it on a platter. Top with powdered sugar, whipped cream, ganache, etc.

Pingback: Recipes | KellyCollinsGeiser
Kelly, thank you for these simple recipes! Loving the work you put out. It really shows how much love you sprinkle over each dish.